

Easy Pavlova Recipe (Crisp Shell, Soft Center, Fresh Fruit)
The first time you crack a pavlova with your spoon, it feels a bit like magic. The outside is crisp and delicate, but inside you hit a soft, marshmallow cloud. Then you taste the cool whipped cream and bright fruit on top, and suddenly it feels like a party dessert you want to make again and again.
A pavlova recipe is simply a baked meringue dessert that you dress up with cream and fruit. People love it for holidays, birthdays, and summer cookouts because it looks beautiful on the table but is light and easy to eat.

This version uses basic pantry ingredients and clear steps, so even a nervous beginner can do it. You will learn what ingredients to use, how to shape and bake it, and how to avoid cracks or a flat, chewy disk. By the end, you will be ready to pull a showstopper pavlova out of your own oven.
What Is Pavlova And Why This Pavlova Recipe Works Every Time
Pavlova is a dessert made from whipped egg whites and sugar that is baked at low heat until the outside dries and the inside stays soft. You top it with whipped cream and plenty of fresh fruit. It comes from Australia and New Zealand, and it often shows up at Christmas, Easter, and summer gatherings.
A quick overview: pavlova vs. regular meringue dessert
If you have had meringue cookies, you know they are dry and crisp all the way through. The meringue on a lemon meringue pie is fluffy from top to bottom.
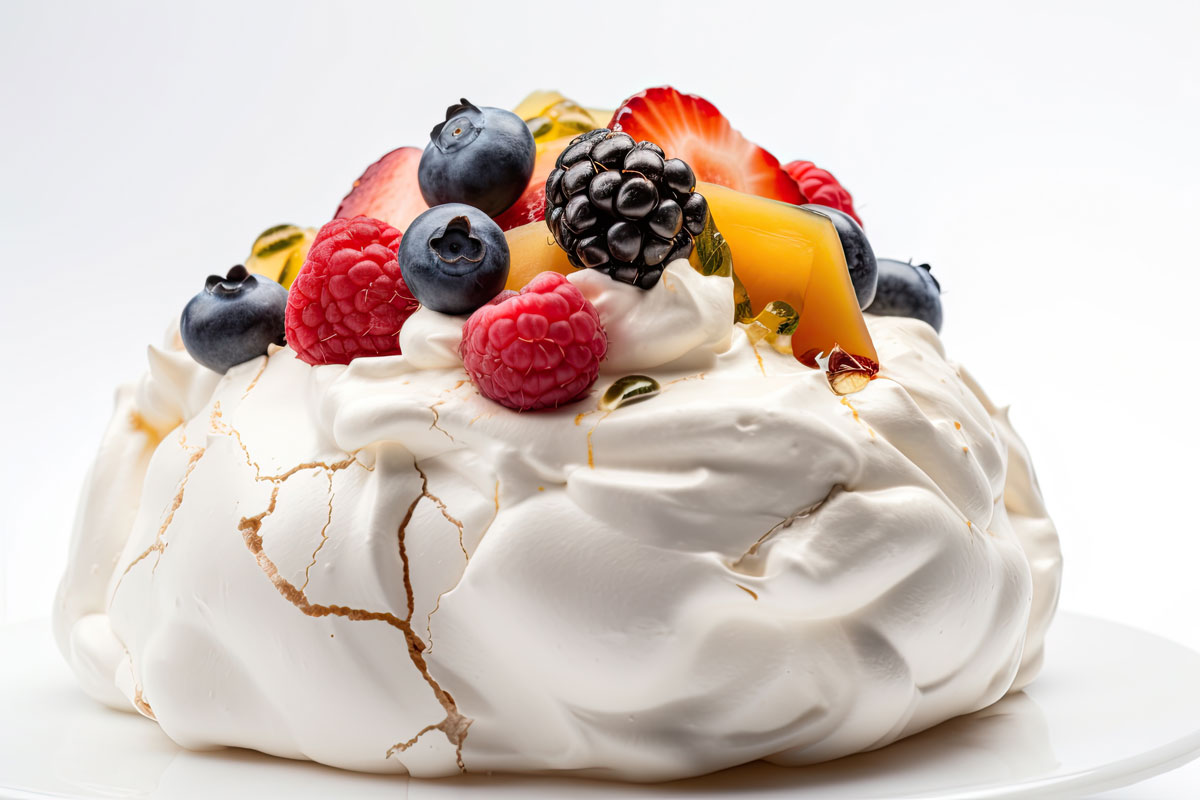
Pavlova is different. The outside shell is firm and crisp, almost like a thin sugary crust. The inside is soft, sticky, and marshmallowy, so every bite feels light and chewy at the same time. That contrast is what makes pavlova special.
To get this texture, pavlova bakes low and slow, then cools inside the oven. The gentle heat dries the outside without turning the inside into a cookie. The slow cool down helps it stay tall and keeps the center soft instead of collapsing.
Key features of the perfect pavlova texture and flavor
A good pavlova should have:
- A pale, crisp shell that is set and dry, not dark brown
- A soft, marshmallow center that feels fluffy and stretchy, not dense
- A light sweet taste that does not feel heavy or cloying
Since the base is sweet, tart fruit is your best friend. Berries (If you like these you will love these Irresistible Strawberry Desserts. Check out the recipe.), passion fruit, kiwi, and citrus all cut through the sugar. Each bite should give you crunch from the shell, softness from the center, cool cream, and a burst of juicy fruit.
The goal of this recipe is to balance sweetness, structure, and chew. Enough sugar for stability, enough acid and cornstarch for that soft center, and baking times that keep the color pale and delicate.
Why this easy pavlova recipe is foolproof for beginners
Many people think pavlova is hard, but this version keeps things simple. (Discover the guide to always tasting delicious food).
- You use clear measurements and basic ingredients
- The recipe calls for room temperature egg whites so they whip up high and stable
- Cornstarch and vinegar or lemon juice help the meringue stand tall and stay soft inside
- The timings are simple, and you do not need special tools beyond a mixer and a baking sheet
If you worry about cracks, do not stress. Small cracks are normal and easy to hide under whipped cream and fruit. The step by step guide below tells you what the meringue should look and feel like at each stage, so you do not have to guess.
Ingredients And Tools You Need For A Classic Pavlova Recipe
You do not need fancy ingredients to make pavlova. Most of these items are probably already in your kitchen.

Simple pavlova ingredients and what each one does
Here are the basics and why they matter:
- Egg whites: Create the structure and volume
- Granulated sugar: Sweetens the dessert and stabilizes the whipped whites
- Cornstarch: Keeps the center soft and marshmallowy
- White vinegar or lemon juice: Adds acid that helps the meringue stay tall and hold its shape
- Vanilla extract: Adds warm flavor to the base and cream
- Heavy cream: Whips into a soft, rich topping
- Fresh fruit: Balances the sweetness and adds color
Room temperature egg whites whip more easily and reach more volume than cold ones. Super fine sugar dissolves faster, but regular granulated sugar works as long as you add it slowly and give it time to dissolve.
Best fruit and topping ideas for your pavlova
Pavlova is very flexible. You can match the toppings to the season or to what you already have.
Some great combinations:
- Mixed berries (strawberries, raspberries, blueberries)
- Kiwi and strawberry slices
- Passion fruit pulp with a few berries
- Sliced mango and pineapple
- Peaches, nectarines, and plums in summer
Pavlova is sweet, so tart or bright fruit keeps it from tasting heavy. You can drizzle a little berry sauce or lemon curd on top if you like, but keep toppings light so the shell does not get soggy too quickly.
Helpful tools to make pavlova at home
You do not need professional tools. Just gather:
- Electric hand mixer or stand mixer
- Large clean mixing bowl (glass or metal, no plastic if possible)
- Baking sheet
- Parchment paper
- Rubber spatula
- Spoon or offset spatula for shaping
The bowl must be clean and dry, with no grease or egg yolk inside. Any fat stops the whites from whipping properly. If you want a neat round shape, you can trace a circle on the back of your parchment using a plate as a guide, then flip it so the pencil marks face down.
Step By Step: How To Make Pavlova That Is Crisp Outside And Soft Inside
Now for the fun part. Take your time with each step and use the visual cues so you know you are on track.
Step 1: Prepare the oven and baking sheet the right way
Preheat your oven to a low temperature, around 250 to 275°F. Low heat dries the pavlova slowly and helps keep the color pale instead of golden.
Line a baking sheet with parchment paper, not foil. Parchment prevents sticking and gives the pavlova a smooth base. If you want a guide, draw a circle about 7 to 8 inches wide on the back of the parchment, then flip it over.
Place the oven rack in the center so the heat surrounds the pavlova evenly.
Step 2: Whip egg whites and sugar until glossy and stiff
Add your room temperature egg whites to the clean bowl. Start mixing on low speed until they look foamy, like bubble bath.
Increase the speed to medium. Begin adding sugar one spoonful at a time, waiting a few seconds between each addition. This slow feed gives the sugar time to dissolve and keeps the meringue smooth.
Once all the sugar is in, keep whipping until the mixture is very thick and shiny. When you lift the beaters, the peaks should stand straight up and not droop. If you pinch a tiny bit between your fingers, it should feel mostly smooth, not gritty with sugar.
Stop before the meringue looks dry or clumpy, since that can lead to cracking.
Step 3: Fold in cornstarch, vinegar, and vanilla gently
Sprinkle the cornstarch over the top of the whipped meringue. Add the vinegar or lemon juice and a splash of vanilla.
Use a spatula to fold, not stir. Cut down through the center of the bowl, scoop around the sides, and lift the mixture over itself. Turn the bowl as you go. This gentle motion keeps the air bubbles inside, which is what makes your pavlova tall and light.
These additions help the center stay soft and cushiony and make the meringue more stable while it bakes.
Step 4: Shape the pavlova base with a soft center well
Spoon the meringue onto the center of the parchment, piling it into a tall mound. Use your spoon or offset spatula to spread it into a round shape, using your traced circle as a guide if you made one.
Build the sides a little higher and leave a shallow dip in the center, like a bird’s nest. That well will hold the whipped cream and fruit later.
Do not worry about making it perfectly smooth. Swirls and peaks look very pretty once the pavlova is baked and slightly cracked.
Step 5: Bake low and slow, then cool in the oven
Place the baking sheet in the center of the oven. Bake at low heat until the shell feels dry to the touch and looks set and pale. The pavlova should not turn deep brown. A very light ivory color is fine.
The baking time will be longer than a normal cake, which is normal for pavlova. Low heat protects the texture and reduces large cracks.
When the shell is set, turn off the oven. Leave the pavlova inside to cool completely with the door closed or slightly cracked. This slow cooling helps prevent sudden temperature changes that cause big cracks or sinking.
Patience here gives you a better result.
Step 6: Add whipped cream and fruit right before serving
Once the pavlova is completely cool, carefully transfer it to a serving plate.
Pour cold heavy cream into a clean bowl. Add a spoonful of sugar and a little vanilla. Whip until soft peaks form, so the cream is thick but still smooth and spreadable.
Spoon the whipped cream into the center well and spread it gently. Top with fresh fruit just before serving. This timing keeps the shell crisp as long as possible.
If you have leftovers, store them in the fridge. The shell will soften as it sits with cream and fruit, but it will still taste great.
Troubleshooting And FAQs: Fixing Common Pavlova Problems
Even with a good recipe, pavlova can have quirks. Here are quick answers to common problems.
Why did my pavlova crack, sink, or turn brown?
Small cracks are normal and easy to hide under cream and fruit. Large cracks or sinking usually come from:
- Oven temperature too high
- Opening the oven door too early
- Cooling the pavlova too fast
- Overbeating the egg whites until dry
If your pavlova turns brown, the oven was likely too hot or the pan sat too high in the oven.
Helpful tips: bake at low heat, place the rack in the center, avoid opening the door while baking, and cool it slowly inside the oven. An oven thermometer can help if your oven runs hot.
How to keep pavlova from weeping or leaking liquid
Weeping looks like tiny beads of syrup on the surface or a sticky pool under the pavlova. Main causes include:
- Sugar not fully dissolved in the egg whites
- High humidity in the kitchen
- Underbaking the shell
To prevent this, add sugar slowly and whip until you can no longer feel grains between your fingers. Try not to make pavlova on very humid days if you can avoid it. Bake until the outside feels dry and set, not sticky.

Can I make pavlova ahead and how do I store leftovers?
You can bake the pavlova shell a day ahead. Let it cool completely, then store it at room temperature in an airtight container. Do not add cream or fruit until you are close to serving.
Once topped with cream and fruit, pavlova is best within a few hours. For leftovers, cover and refrigerate. The shell will soften, but the flavor stays lovely.
If you want easier storage and serving, make mini pavlovas by shaping several small rounds instead of one large one. They bake a bit faster and are simple to plate for guests.
Pavlova looks fancy, but it comes down to a few simple steps: basic ingredients, careful whipping, low and slow baking, and topping it just before serving. With this guide, you can create a pavlova that is crisp on the outside, soft in the center, and piled high with fruit.
Try it for your next holiday, birthday, or quiet weekend dessert, and play around with different fruits and sauces. Once you hear the crack of that first slice and taste the marshmallow center, you might find yourself making pavlova far more often than “special occasions.”
Discover more delicious desserts to prepare